Thursday 23 March 2017

Window frames and cladding

Raquel sanding the exterior wall boards. We tried experimenting by de-barking some of the cladding to see what we preferred. As the house is already quite modern looking, we both decided that we like the rustic look of the boards still with the bark on.


 We just put 2 boards together on a wall to see how it works. It looks beautiful! We loved it!

We went again to the store in Tabua to see if they had more second hand windows, since we enlarged one of the window holes in the frame, and we were hoping to find some glass to fit.

 Scrap wood that we use in our wood burner in the BUS. We don't waste anything!

Adam, looking like he is just about to knock Katja over the head. Working together isn't that bad really.


 Katja and Adam helping us with some wood cutting.

 Little glass window on the step area is on!

 Windows waiting to be put into place.

Look at the frame that David created! It looks very beautiful. 

 Writing the measurements to cut the wood while David experiments some finishing treatments on the  outside wood.

This one is a special one for our sister Laura. Happy bEErthday dear Laura!

Starting the exterior cladding


A general view from the house as it is before the cladding.

While waiting for our pine tar resin to come, we borrowed some from our local neighbor wood dweller,  Marko.

Look at the effect on the wood / better than we were expecting! We love it!

Us at lunch, looking at the house and having fun!


Trying out the resin mixture and most importantly treating the end grains of the boards before we fitted them.

This image reminds me of the forest sprits and allows me to get in touch with the sacredness of trees and how grateful we are for the wood that we are building the house with.

Adam and Katja helped us Sunday afternoon, just before the rain and the cold comes again. We are again running with time because of the weather!


Board by board the wall grows! And you can see the difference between the wood that was treated and the boards that have no treatment at all.

This video shows how powerful is the nail gun. It was the last nail of this wall!

More windows going in....

 David oiling the windows / after that they just open and close so easily! Incredible what WD40 can do.

We are using a combination of pine tar resin, linseed oil and turpentine. The turpentine and pine tar resin both come frome pine trees. After some research and having already used this combination we felt that this was the most natural and long lasting method of treating the exterior cladding.

The first window in the bathroom area in into place!

I love these artistic shots that Raquel took. We were very excited with the windows going in, can you tell? :)
Measuring up! Always check your measurments, tape measures can play tricks with you!

Reluctantly posing for a window shot. I love it that Raquel is so passionate about taking pictures, but I don't always like to be in them.

Look it's another window! These are from our second hand range and this is one of the kitchen windows.

 Windows on, windows on. Did we mentioned already that windows are in place?!

These are some double glaze peices of glass we picked up free from lumitabua. Maybe for a future project?

Finishing the battening and installing the windows.

Installing the Windows 

This was a while ago now, we are just getting upto speed with the blog...
 
You can see hear the eucalyptus battens going over the black breathable mebrane. These give something to fix the side cladding too, and importantly create an air gap between the membrane and external wall. I also left small gaps in between the battens so air can also pass the width of the wall as well as the length.


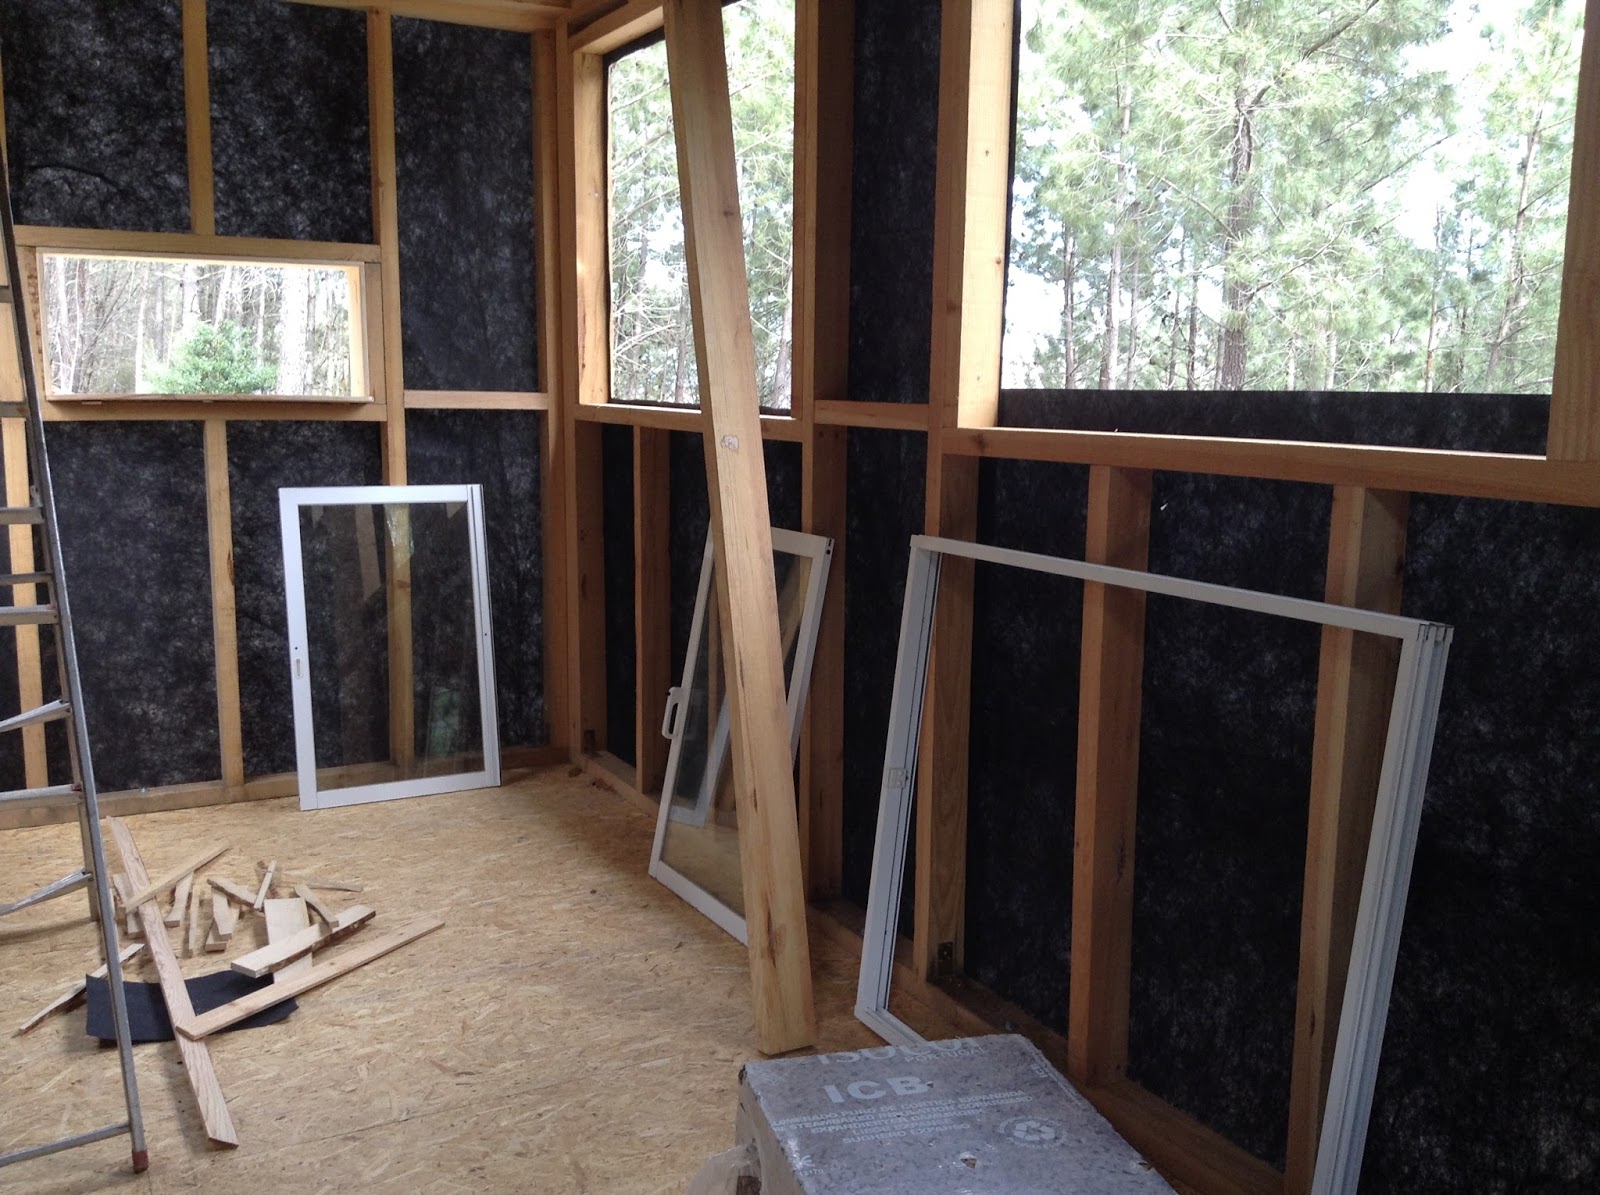
These are the first windows going in. We bought these several months ago secondhand and designed the frame to fit the windows. This is an important consideration if you are using second hand, as it is less likely to find windows that fit a random size you might build too.


This is looking out of the loft. We have two sliding opening windows and two smaller fixed glass ones either side of where the bed will be. It is really nice and light now in the loft, and I just love these sliding windows, they are the best quality of the ones we bought.

They are long and narrow, perfect for the low ceiling height in the loft.


This is me puzzling over how to make the frames. I had to consider how best to frame the windows in a simple way whilst making them simple, beautiful, and so the rain doesn't come in. After a bit of trial and error. I think I cracked it!


Just tacking the window in place to see that everything fits and that the exterior claddingmeets well to the frame

.
On the left you can see one of the loft windows in. We have one on each side, both slightly different sizes, it doesn't matter though they look great and we are very happy that we could get second hand ones.
The picture on the right is the empty spaces waiting for the windows. Including the bathroom we have 11 windows, which is quite a lot in a small space.


You can see the frame from the outside, rustic meets modern.

Adam helping with some window fitting. He is volunteering at the project at the moment and has been helping with the house on a few occasions. I t has been great to havi him help, and he has loved it too.


Packing up at the end of the day.


Looks like Darth Vadars house. I was having second thoughts when it was looking just like a black box on wheels.

This is the bottom of the battening. the horizontal peices are fixed at an angle, so if any moisture does manage to get in, it can run off at the bottom. Hopefully though this won't happen!