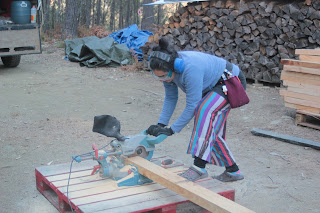
About 2 weeks ago, we went to the wood yard to get the rest of the wood that was missing; another fact that delayed the construction of the frame was not having all the wood that we needed.
But we are very happy now!
We have all the wood for the frame and loft and we can't wait to continue to build the house.
Lots of love
Raquel
Thursday, 26 January 2017
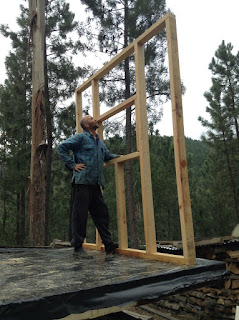
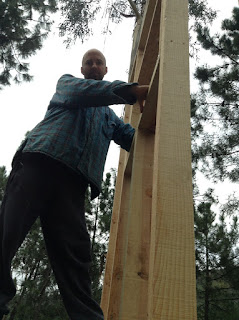
Two parts of the walls frame are done!
They are so heavy!
It looks that we have a house already!
Bathroom wall frame and David trying out the view.
We are very happy to show you our 2 first wall frames!
We could not imagine that it would take so little time. We had the help of our friend Helder and in a couple of days they were done!
Meanwhile we had to stop the building tasks because we participated in an amazing retreat of the project that we are co-creating and due to the weather conditions.
For now, we are shopping and asking for prices for other materials that we need quite soon: like roof, outside wood and inside wood (floor, walls and roof).
Lots of love,
Raquel
Tuesday, 10 January 2017
Up and running with the new water filter (with videos!)
Pipe up (part 2)
Today we finished the installation of the filter box. It was sooo great to fit the last bits of pipe and to see it working. This is not something I have invented in a short space of time. It has taken me about two years, and two very wet winters, and a lot of contemplation and pondering. I think I first got the idea off the internet where I saw examples of self cleaning filters. We also have friends in the valley around us who have different ways of catching the water, some even use an old washing machine drum! Because we already had the gate/mouth built into the stone, it set a good foundation to work from.
It is in... it is working... lets see if it can get us through the winter.....
First section of pipe going in. We secured it with clamps and thread rod that is drilled and set into the stone. We covered the filter box to prevent water coming out of the pipe whilst we were working.
Floris cooling of the pipe in the water. To join each section you have to heat one end and push the next piece into it. We used a blow torch to do this. Generally it is quite simple to do, sometimes you really gotta wrestle with it :)
Pipes in place, time to take off the plastic!
At this point I was very jubilant!!!
Once we had finished we let any air exit out of the pipe. This can take a while as we only have several places to bleed it from. More to improve there at another time.
This is me giving a brief and simple run through of the old and new system. (Sorry about the sound, filming almost in the stream has it's limitations!)
This is some video I took last year just after we had a lot of rain. It is taken at the same place of the first video, although a lot of it is submerged under water. This is what the new improved version is up against. If it can handle this, the rest of the year should be no problem.
Thanks for tuning in...
David
Presents for the Tiny house
As a way to say that they love what we are doing, some of our friends and family give us presents for the Tiny house.
I love the fact that the house is not up yet, and still we receive things to decorate it already.
Some are beautiful!
Here it is the last one that Katja gave to us: a set of lamps that run with batteries (3x AA). We didn't resist to use them in the BUS already.
Thank you Katja!
We love them; the beauty, cosyness and the romantic environment that brings (into the BUS for now and into the Tiny House in the future)!
Transparency... more light!
David was focused on having more light in the tiny house. I would like that, but one of the things that we experience living in the BUS is that with so many windows, the temperature doesn't maintain inside.
But, if we put small double glasses here and there we can have more light and the be comfortable temperature wise.
So, after taking the decision, David went to Tábua to get materials for the filter box. And he decided to ask to the sweet and very nice workers in Supermaco if they knew of a window store, or something like that, around. And in the same street there is an aluminum window store.
David asked for double glasses, small ones and for the price of them.
Guess what? They gave him 4 glasses for free!
Amazing! We are very grateful for the offer and for the fact that we can re-use materials!
Thank you!
Monday, 9 January 2017
Before the rain comes....
Filter box
I have been working on building a filter box for our power and water system here on the Quinta. It is not exactly tiny house work, but as we rely on the energy from our off grid supply, it is an essential part of our functioning and well being here. The river is very low at the moment. Apparently the rain is coming and so in order for our water supply not to be totally submerged in the deluge of debris that comes with all the water I have designed, I think, a good solution. Time will tell of course, but for know it seems to be looking good. I just hope the weather holds out a bit longer so we can get some of the frame built on the house!!
Here are some pictures to give you an idea:
This is the "mk 1"
It worked, but needed some improvements.
'Mk 2' With improved mesh and increased angle. The idea is that any debris gets washed off the mesh.
Close up of the mesh.
With some help from Floris, we put the box in the flow of the stream.
It is pretty cold in the water and Floris had holes in his boots!! He worked on with wet feet and no complaining, Trooper!!!
A few adjustments.
Here it is in position.
How it works: As the water runs over the back of the box and mesh, it enters into the box and then flows out of the black pipe at the end. We will then connect this pipe on to our main water supply. The mesh prevents any large debris coming into the box and pipe, and because it is at an angle, the force of the water washing over it washes anything that might block and cover the mesh.
So far, so good! We will see how it works tomorrow when we connect the pipe up.
Stay tuned....
Monday, 2 January 2017
Another layer on the floor
Today was a short work day on the trailer!
Just because it was so windy that it could be dangerous to work outside. So, David trimmed the last edges on the OSB boards and put the last layer of plastic on top of the boards.
This will prevent the humidity to enter.
We are hoping to start tomorrow with one part of the wall frame.
Raquel
Just because it was so windy that it could be dangerous to work outside. So, David trimmed the last edges on the OSB boards and put the last layer of plastic on top of the boards.
This will prevent the humidity to enter.
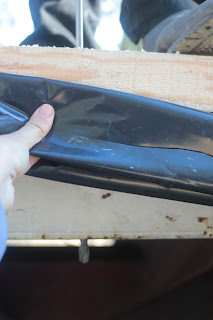
Last layer of plastic.
We had a visit from a friend. Floris that is part of the "Vida em Transição" project came to see the progress of the house.
David showing how high the house is going to be in the highest point.
We are hoping to start tomorrow with one part of the wall frame.
Raquel
Sunday, 1 January 2017
Living in a tiny house
Before living here at Mizarela, I lived around 10 years in a small house in Rio Tinto. An amazing, lovely house with a garden and a backyard. It was small, but enough for one!
I noticed quite fast that if I didn't leave things in their place the house would be uncluttered. So, I was determined to always leave them where they were supposed to be.
That was a very good experience, because now I can put it into practice again and I don't freak out when things don't go as I planned or when I think that this space is to small!
Living in a 7m BUS with another person? Challenging, practical, minimalist and I love it!
We have a bedroom, kitchen, living room, dining room and a corridor. It's real! The bed at the end, with the kitchen on the left and before that, 2 sofas and we can put a table between them. And last, but not the least, we a have a corridor where we dance together.
We have some storage that is spread everywhere inside of the BUS and outside as well.
Because we don't have a lot of space we have to choose very wisely what we keep inside. And that is a choice made by me and David. 2 Wills that sometimes don't meet. But the important thing is that we talk about it and we just decide what is the best thing. Not what I want or what David wants, but what we want and what's the best choice.
In the end there is no rule. We want to be in the moment and that's the daily practice living in such a tiny place.
Of course, we have (I have the most part of it) other belongings that are stored somewhere else and some of them are going to be useful when we move to the Tiny House. But for now, the BUS has been enough.
Every day we are grateful for this BUS; it's warmth, it has the sense of protection and, more than that, the sense of home that it gives to us.
I laugh at those moments when I just want to scream I WANT MY SPACE and I look around and we only have 1 room to be!
I love when we put our favorite songs and we dance together in the corridor. Not a lot of space but a lot of fun!
I am grateful for the minimalist type of living that we have here.
And smiling, we say that we are going to upgrade moving from the BUS to the tiny house - it's bigger and we learned a lot with with it: how to keep a very small place where a couple lives organized, de-cluttered, cleaned and homie.
The most important things that are needed are love, detachment and a will to minimize and to be organized.
I will write a set of posts around minimalism in a house and organization of spaces.
Stay tuned!
This is one of the things that we love to do in the BUS, with our small gas cooker: pancakes!
Special Sunday breakfasts, as a celebration for good and healthy food (we cooked them on top of the wood burner) and for today, a way to say hello to 2017!
With love,
Raquel
I noticed quite fast that if I didn't leave things in their place the house would be uncluttered. So, I was determined to always leave them where they were supposed to be.
That was a very good experience, because now I can put it into practice again and I don't freak out when things don't go as I planned or when I think that this space is to small!
Living in a 7m BUS with another person? Challenging, practical, minimalist and I love it!
We have a bedroom, kitchen, living room, dining room and a corridor. It's real! The bed at the end, with the kitchen on the left and before that, 2 sofas and we can put a table between them. And last, but not the least, we a have a corridor where we dance together.
We have some storage that is spread everywhere inside of the BUS and outside as well.
Because we don't have a lot of space we have to choose very wisely what we keep inside. And that is a choice made by me and David. 2 Wills that sometimes don't meet. But the important thing is that we talk about it and we just decide what is the best thing. Not what I want or what David wants, but what we want and what's the best choice.
In the end there is no rule. We want to be in the moment and that's the daily practice living in such a tiny place.
Of course, we have (I have the most part of it) other belongings that are stored somewhere else and some of them are going to be useful when we move to the Tiny House. But for now, the BUS has been enough.
Every day we are grateful for this BUS; it's warmth, it has the sense of protection and, more than that, the sense of home that it gives to us.
I laugh at those moments when I just want to scream I WANT MY SPACE and I look around and we only have 1 room to be!
I love when we put our favorite songs and we dance together in the corridor. Not a lot of space but a lot of fun!
I am grateful for the minimalist type of living that we have here.
And smiling, we say that we are going to upgrade moving from the BUS to the tiny house - it's bigger and we learned a lot with with it: how to keep a very small place where a couple lives organized, de-cluttered, cleaned and homie.
The most important things that are needed are love, detachment and a will to minimize and to be organized.
I will write a set of posts around minimalism in a house and organization of spaces.
Stay tuned!
One of the sofas with a beautiful Minde blanket.
Our living room a.k.a. dining room. Sometimes we light the oil lamp that comes from Marinha Grande.
The "dance floor" corridor and the bedroom with so many hand made details, like the carpet made by me and my mum with scraps of fabric, the small rug came from Brasil handmade by a group of women and the "Espanta Espíritos" made by a Brasilian friend.
This is one of the things that we love to do in the BUS, with our small gas cooker: pancakes!
Special Sunday breakfasts, as a celebration for good and healthy food (we cooked them on top of the wood burner) and for today, a way to say hello to 2017!
With love,
Raquel
On the 30th
Floor frame down, time to top it off with some OSB boarding. This will be the base for the finished flooring to come. I think we will use some local pine floor boards. That is a way off yet, and will come once we have the walls and the rest of the frame finished. We want to leave that as long as possible to protect it from any damage whilst we are working.
What we have so far as the floor in layers: the trailer's original floor, some black plastic( to prevent any moisture coming up through the trailer), wood frame with cork inside, and OSB sheeting on top .
Using the chalk line to find the centre. This then gives us the centre point of the floor joist to screw into. Simple technology, works wonders!
OSB marked and ready for us to cut and/or to screw.
Raquel cutting the OSB boards to fit.
Missy didn't resist to David's invitation to come on top of the trailer! She loved it and just stayed for a while for some strokes.
At the end of the day, to warm up the BUS and ourselves, we used scraps of the wood that we have been cutting to make the floor frame.
David and Raquel
On the 29th
Today we got cracking with laying the first level of flooring and insulation. This was an exciting day for us because after so much planning and preparation we were finally going to get building! woohoo!
David & Raquel
What is the plan for today?
Drilling the wood through the floor frame and metal chassis of the trailer. Super long drill bit made the work effortless. It really helps when you have the right tools. This one was from Supermaco, our favourite hardware store. We love you Supermaco!
Clamping the wood in place and cutting the metal thread rod to bolt it all together. After already securing some of the flooring I realised that it would be better to also have the bolt going through the frame also. So we will wait to to this once the frame is on. That will be coming next...
Olha Pai Sesinando, vê como a madeira está bem segura à estrutura metálica; era a isto que te referias, não era?
Woohoo, finally getting a chance to use the nail gun. It made quick work of things and we realised that the right choice was made.
Cork in, but we decided to put all the wood first and then the cork at the end.
David looking at the plans on Sketch Up. This is where all the time on sketchup really started to pay off. I have a ready made diagram to refer to, with all the dimensions and pieces of wood to use.
Cutting the wood pieces to measurement. Raquel making fast work of cutting the wood to length ready for the floor frame. We made a great team :)
Small adjustments at the end of the structure so we could put in the last piece of cork.
A small break in the afternoon: tea and chocolate crackers, mmmm!
Almost every cork into place. I designed the floor so that the cork would fit in between the joists. This saved a lot of time as we did not have to cut the cork so much. It was very satisfying to put it into place, I love cork.
Cutting small pieces of cork to fill in the places left.
We did have to cut some to size to fill in length ways. It is super easy and fast to cut and no yukky toxic dust.
We did have to cut some to size to fill in length ways. It is super easy and fast to cut and no yukky toxic dust.
You can't see so well in this picture, but this is the finished floor frame with the cork in place. Looks exactly the same as in my drawing :)))
And cork is in! Ah, the warrior rests...
OSB was the next layer.
We just had time to put the OSB on top of the cork layer without attaching it. Tomorrow is another day!
David & Raquel
Subscribe to:
Comments (Atom)


